I was feeling discouraged about what to have for dinner tonight and just generally tired and a little cranky. If I can't decide what to eat, I could always blog about eating, I thought. People are always asking me why I'm vegetarian. To cram it all into one post would be a disaster. It would be unorganized and scatter brained, so I'm going to do a series of posts describing how my eating habits of today came to be. This series can grow with me, as my philosophy continues to develop.
It started December 28th, 2011. I turned twenty-four years old and it hit me, I'm in my mid-twenties. I knew I would be thirty with the blink of an eye! So I decided that I needed to grow up a little bit and take care of my body. I was literally living off of fast food. Burgers, chicken sandwiches, fries, bacon and egg biscuits, the usual from the most conveniently located fast food joints. I typically ate two large, fast food meals a day- both of them on the run. I would get tired easily through the day, but correct it by drinking a soda or a Red Bull. I would get a headache and pop Excedrine. In fact, I was getting headaches often. One of my professors was telling me how taking OTC medication too often can cause even more problems, especially in the realm of headaches. I began to think that maybe my lifestyle needed to change.
When I was in high school, I spent an entire summer waking up at 6 AM to meet a few friends to work out together in preparation for volleyball season. I was active year round. Now I was looking down at the scale that, while not climbing too much, was fifteen pounds over what I was in high school. This wasn't a drastic amount, considering that I had been out of high school for five and a half years, but I knew that it wasn't getting any better and I felt more unhealthy than ever.
My birthday gift to myself on December 28th, 2011 was running. I started with Budd Coates' running program and my favorite beginner's running book ever, Running For Women. This book actually has the linked running program in it, so all of you ladies should buy it! As you can see, during week one I was running for simple two minute intervals. It was kind of tough though, especially by the last one! I realized just how poor of shape I was in that week. To help maintain motivation, I would buy Runner's World magazines each month. One month I was reading about Scott Jurek, ultra marathoner and vegan aficionado. I found this article at a point in my running where it was getting really tough and my legs felt like lead. I believed that my terrible diet (that was still based on eating out two meals a day) was probably a big contributor to how awful I felt.
In just a couple of weeks after reading this article, I had a vacation to Florida coming up. I'd already lost about eight pounds in about five months just from running and was feeling pretty good about that, but hanging out on the beach will make anyone want to work on themselves! Scott Jurek's book wasn't available yet, but I knew I was going to need something to read on this long drive to Florida and the vacation that ultimately, would be my last hurrah before changing my life. I ended up settling for the Engine 2 Diet book after finding it through looking for other vegan/vegetarian stories, since Jurek's book wasn't out yet. It came highly recommended by its readers, so I ordered it and had it rush delivered so I could read it on the way to Florida.
And read it I did! I was hooked and ready to (somewhat regrettably) take a stab at living at the very least, meat free. While in Florida I ate enough meat and amazing food to carry me over for awhile and even make me sick of eating out to an extent. I was ready to cozy in at home and start a new lifestyle.
Monday, August 13, 2012
Wednesday, August 8, 2012
Spicy Tempeh Nori Rolls

A couple of days ago, I received my first vegan cookbook- Veganomicon by Isa Chandra Moskowitz and Terry Hope Romero. I highly recommend it to anyone looking for a vegan cookbook- comfort food style. I can't speak to the healthiness of all of the recipes, I'm certainly no nutritionist. They are, however, undoubtedly healthier than how I've eaten the other 20+ years of my life, so I'm not complaining.
I already knew that I loved some of these recipes by the website that got me into vegan baking, and then vegan cooking- The Post Punk Kitchen. I have yet to bake any recipes associated with PPK without overwhelming success. Simply put, every single one of them has been a delicious hit. So I decided I needed Veganomicon as my first vegan cookbook.
The first true recipe in the book is for Spicy Tempeh Rolls. Allen had said earlier this year that he wanted to make sushi this summer, so why not start with this recipe? I went around town gathering my supplies, which proved to be taxing in 105º weather. I ended up having to stop by three stores to get it all. I found the sushi rice, rice vinegar and avocado at Wal Mart, easily. I ended up going to two specialty stores to pick up the nori seaweed, bamboo roller and oils. I say oils because this recipe calls for hot chili sesame seed oil which proved to be impossible to find in my town. I ended up substituting "hot oil" found in the Asian section mixed with sesame seed oil. Tasted just fine!
Here are the ingredients and directions as posted on the PPK recipe page
Equipment
Bamboo sushi rolling mat
Really sharp serrated knife
Rice cooker or pot for rice
Large preferabely glass bowl to cool rice down in
Small saute pan
Tongs, if you are going to be roasting the nori
Bamboo sushi rolling mat
Really sharp serrated knife
Rice cooker or pot for rice
Large preferabely glass bowl to cool rice down in
Small saute pan
Tongs, if you are going to be roasting the nori
Ingredients
For the rice
1 cup sushi rice made with 1 1/4 cup H20, prepared according to package directions
About 2 Tbs Rice vinegar (do not use regular or any other kind!)
1 tsp sugar
For the rice
1 cup sushi rice made with 1 1/4 cup H20, prepared according to package directions
About 2 Tbs Rice vinegar (do not use regular or any other kind!)
1 tsp sugar
4 sheets nori*
For the filling
1/2 package tempeh (4 oz)
1/4 teaspoon sesame hot chili oil or to taste
1 1/2 Tablespoons vegan mayo
1 green scallion, white part removed, sliced lengthwise into narrow strips
1 Tablespoon black sesame seeds if put inside of roll, or 1/4 cup if used as coating for “inside-out”
1/2 package tempeh (4 oz)
1/4 teaspoon sesame hot chili oil or to taste
1 1/2 Tablespoons vegan mayo
1 green scallion, white part removed, sliced lengthwise into narrow strips
1 Tablespoon black sesame seeds if put inside of roll, or 1/4 cup if used as coating for “inside-out”
Directions
For the rice
Prepare rice according to package instructions. It should be something like 1 1/4 cup H20 to 1 cup rice. Cook till rice is tender but firm, even a little dry.
For the rice
Prepare rice according to package instructions. It should be something like 1 1/4 cup H20 to 1 cup rice. Cook till rice is tender but firm, even a little dry.
Empty hot rice into a large glass bowl. Sprinkle with about rice
vinegar and 1 tsp. sugar. Fold rice gently with a large spoon or rice
paddle. Rice should be moist and have a mild vinegar flavor. Cover with
plastic wrap. When rice is slightly warmer than room temperature it’s
ready to work with.
Meanwhile prepare the filling
Steam and cover tempeh in a small saute pan with enough water to cover it till tender & not bitter (about 10 minutes). Mash with mayo and sesame chili oil
to taste. Layer with scallion, sprinkle with sesame, or make inside out roll if feeling Iron Chef tonight
Steam and cover tempeh in a small saute pan with enough water to cover it till tender & not bitter (about 10 minutes). Mash with mayo and sesame chili oil
to taste. Layer with scallion, sprinkle with sesame, or make inside out roll if feeling Iron Chef tonight
*If you like, use a pair of tongs to roast the nori sheets over the oven flame for 2-3 seconds.
I was feeling Iron Chef myself and made the rolls inside out. To do this, you mash out the rice on the nori like normal, but then lay down a sheet of saran wrap and pick it up, including the bamboo roller. Gently flip the entire thing over, take the roller off the top and lay it down. Lay the flipped over nori on it with the saran wrap in place on the bottom. From there, I laid out my tempeh, green onion (I cheated a little...), and avocado at the line where the rice stopped. I then began rolling the edge with the filling, using the bamboo to help squeeze it tight- just be sure to get that plastic wrap out of the way too! It wasn't nearly as hard as I thought it would be. I'm not completely sure I even did it right, but it was tasty and held together well and that's all I'm worried about.
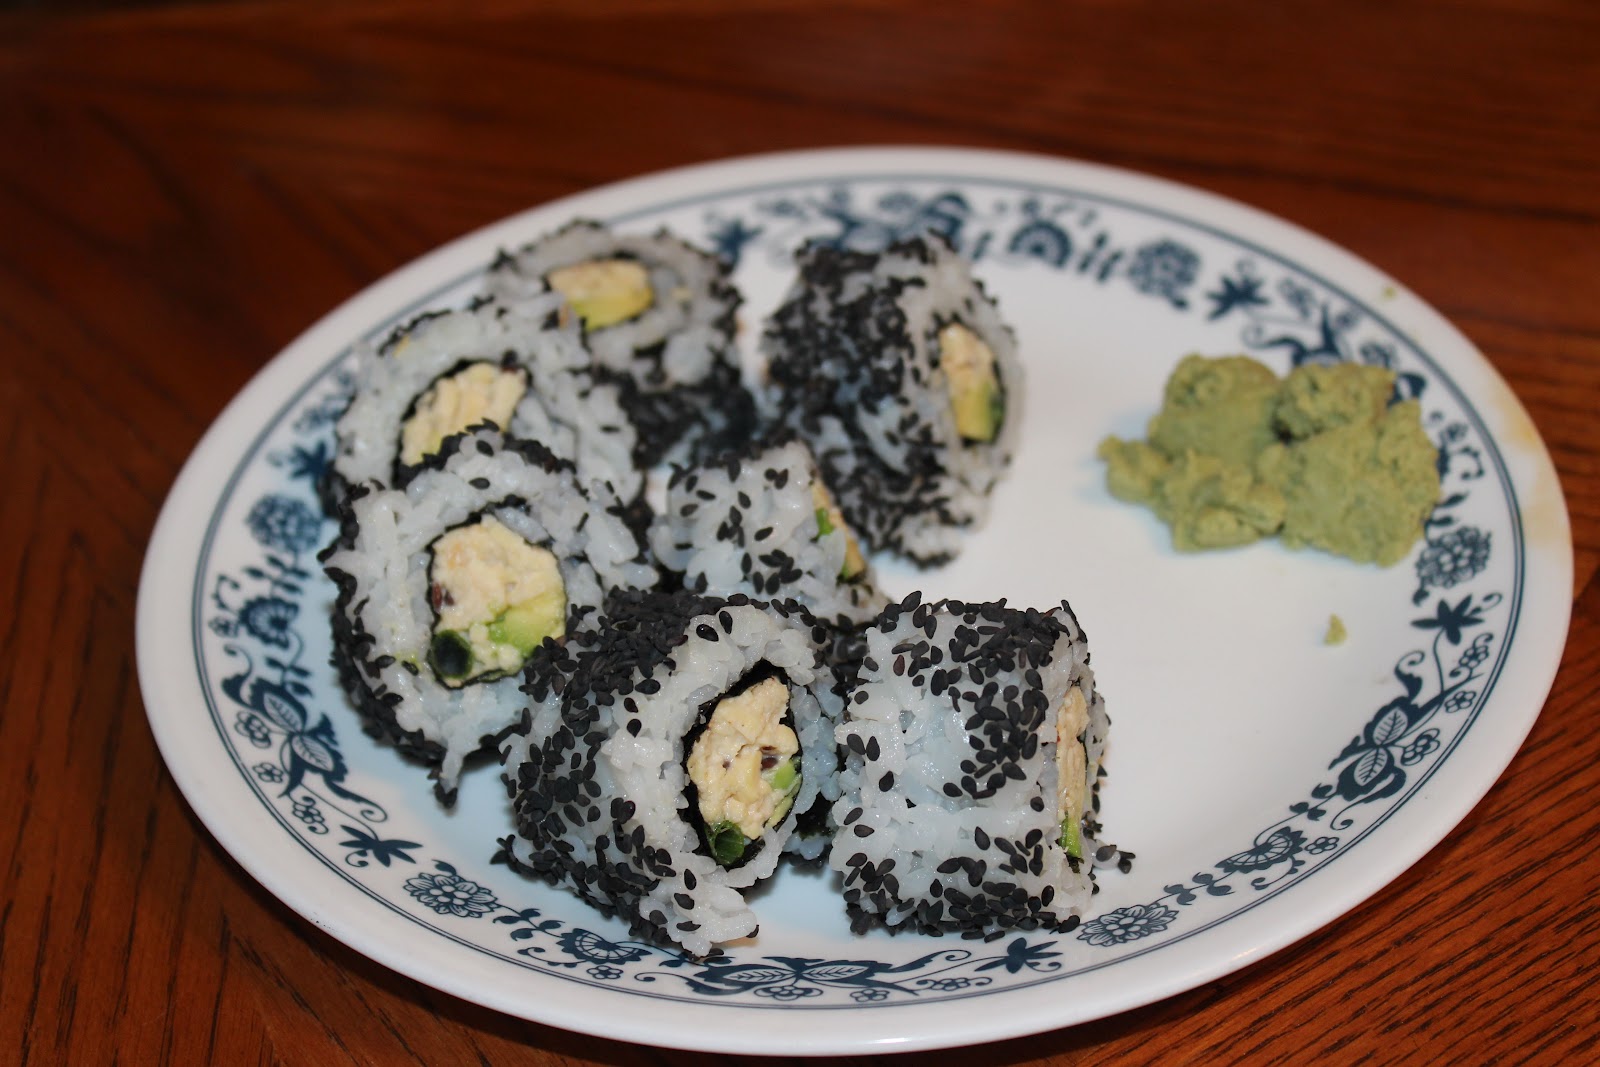

The last picture are Allen's rolls, he set up their presentation! They also happen to not be inside out, so if you make them without the flipping, that's how they'll look! I coated my inside out rolls in sesame seeds, although the second picture was perhaps a bit too heavy on the seeds.
Overall, this was a delightful adventure and fun to roll my own rolls for the first time! I do recommend keeping water in the sink and throwing anything that touches the rice in there when you're done using it, otherwise cleaning up dried sticky rice is kind of difficult. The directions here don't mention it, but keeping a small bowl of water with a dash of rice vinegar around to keep your hands wet so that the rice doesn't stick to you helps a LOT.
If you're like me and you appreciate a visual of all of this, here is the first episode of Post Punk Kitchen showing how to make these. Video Link!
Happy rolling!
Monday, July 23, 2012
Super Easy Black Bean Burgers
These burgers are a new go-to staple in our house. They can be prepped in advanced for a great quick lunch. The credit of using quick cook oats goes to the Engine 2 Diet New York Time's Veggie Burgers. However, I don't choose to include quite everything that they do and get a fabulous tasting, custom burger. The great thing about this is that you can change your seasoning and extra add ins to create the perfect burger. Popular burgers at our house include Buffalo Ranch (yes, awful, non-vegan ranch. I am experimenting with making my own and also bought a vegan ranch that I'll try using after I use up the other ranch) and BBQ burgers (using our favorite BBQ sauce!). I almost always garnish with pickles, lettuce and red onion. I think next I want to try a Southwest Burger, with toasted corn and peppers and chipotle seasoning. Maybe some custom, homemade salsa on top too.

You Will Need:
1 can black beans, rinsed and drained
1 can corn, drained
Quick cook oats
Favorite fixings
Optional:
Carrots
Green onions
Tomatoes
Onions
Desired seasonings
Olives
Cilantro
...whatever else you want.
This recipe isn't an exact science, which is part of what's so great about it! I always start out with 'no salt added' black beans and about 2/3 of the 'no sugar/salt added' corn in the blender. Do NOT add the oats to the blender. Once I get these two blended together, I start adding whatever else I want, depending on the type of burger I want to craft. Adding carrots is a great way to get them into your diet- I'm not a huge fan of but I added shredded carrot to my last patty mixture and couldn't even taste it. One carrot isn't much, but now I know I can add even more! I always add a few finely chopped green onions and yellow onions. Really- add whatever you like. It's a great time to clear out the fridge if you have any veggies that you need to use up. Don't forget seasoning! You can season it just like a hamburger patty.
The oats come as the last step. Empty your bean goo into a mixing bowl. I like to use the remaining 1/3 of my corn to mix in after I'm done blending. Mostly because I think it's pretty, so you can do that if you'd like. Start adding oats and stirring them in. The oats are the binding element that stops your burger from falling apart. Most black bean burger recipes I've read call for a bread of sorts- finely chopped, bread crumbs, etc. Oats are so easy to use and still taste great! Again, this isn't an exact science and how many oats you add really depends on what all you blended up and how wet your bean mixture is. I just add oats and stir until I get a consistency that I can form a patty out of that won't fall apart.
Next, turn a burner to medium or medium-high heat. I use a non stick skillet and a spray of Pam Olive Oil just for extra anti sticking security. Sometimes they stick without Pam, but luckily I haven't had any be ruined because of it, they're just not as pretty. After I get a slight browning on each side, I begin to smash the burgers a little so that they flatten out a little bit more and don't have a gooey center. I smash them with my spatula and then let them cook on that side a few moments longer. I flip them and repeat until they seem to be smashed enough that they aren't gooey on the inside. If you do this too long, they simply get a bit dried out and crunchy around the edges, which wasn't entirely unpleasant either.
I typically just refrigerate my left over mixture and make patties as I need them. Some people I've read about form patties and stick them in the freezer for later. Ours don't really stick around long enough to warrant putting them in the freezer since we eat them pretty quickly, but I imagine you could if you wanted to.
They're pretty versatile little burgers. So go wild! If you do make them, take a picture, I'd love to see!
Super Easy Black Bean Burgers

1 can black beans, rinsed and drained
1 can corn, drained
Quick cook oats
Favorite fixings
Optional:
Carrots
Green onions
Tomatoes
Onions
Desired seasonings
Olives
Cilantro
...whatever else you want.
This recipe isn't an exact science, which is part of what's so great about it! I always start out with 'no salt added' black beans and about 2/3 of the 'no sugar/salt added' corn in the blender. Do NOT add the oats to the blender. Once I get these two blended together, I start adding whatever else I want, depending on the type of burger I want to craft. Adding carrots is a great way to get them into your diet- I'm not a huge fan of but I added shredded carrot to my last patty mixture and couldn't even taste it. One carrot isn't much, but now I know I can add even more! I always add a few finely chopped green onions and yellow onions. Really- add whatever you like. It's a great time to clear out the fridge if you have any veggies that you need to use up. Don't forget seasoning! You can season it just like a hamburger patty.
The oats come as the last step. Empty your bean goo into a mixing bowl. I like to use the remaining 1/3 of my corn to mix in after I'm done blending. Mostly because I think it's pretty, so you can do that if you'd like. Start adding oats and stirring them in. The oats are the binding element that stops your burger from falling apart. Most black bean burger recipes I've read call for a bread of sorts- finely chopped, bread crumbs, etc. Oats are so easy to use and still taste great! Again, this isn't an exact science and how many oats you add really depends on what all you blended up and how wet your bean mixture is. I just add oats and stir until I get a consistency that I can form a patty out of that won't fall apart.
Next, turn a burner to medium or medium-high heat. I use a non stick skillet and a spray of Pam Olive Oil just for extra anti sticking security. Sometimes they stick without Pam, but luckily I haven't had any be ruined because of it, they're just not as pretty. After I get a slight browning on each side, I begin to smash the burgers a little so that they flatten out a little bit more and don't have a gooey center. I smash them with my spatula and then let them cook on that side a few moments longer. I flip them and repeat until they seem to be smashed enough that they aren't gooey on the inside. If you do this too long, they simply get a bit dried out and crunchy around the edges, which wasn't entirely unpleasant either.
I typically just refrigerate my left over mixture and make patties as I need them. Some people I've read about form patties and stick them in the freezer for later. Ours don't really stick around long enough to warrant putting them in the freezer since we eat them pretty quickly, but I imagine you could if you wanted to.
They're pretty versatile little burgers. So go wild! If you do make them, take a picture, I'd love to see!
Subscribe to:
Posts (Atom)